Hey there,
If i could do my Desiree happy dance, i so totally would! But alas all the hard work from the last two days have taken its toll on my unsuspecting thighs! You may be wondering what on earth i could have done that does not involve some torture machine at a gym? Well ladies and gents i will tell you, i made a pallet headboard.
Now don’t let that scare you off, it takes time, it takes some effort but its loads of fun, looks great and can be done for so much less money than buying it at a store.
MATERIALS NEEDED!
1 Large Pallet (Depending on size, mine was for a queen size bed)
2 Anchor woods (Cut to your desired length)
Drill
Screwdrivers
Screws
Wood stain
Varnish
Headboard sponge
Material
Buttons
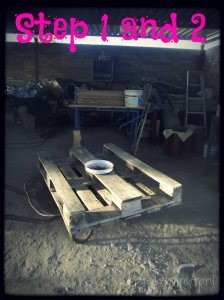
STEP 1 & 2
Remove all the individual wood pieces from the pallet as neatly as you can. Pallet wood does tend to be a bit fragile, so breaking the pieces away from the board as hard as you can may destroy the wood. Once you have removed the pieces and nails, you can sand down the edges or the whole wood piece.
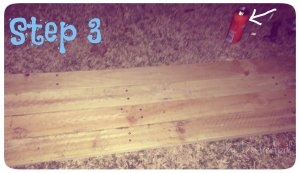
Step 3
When you have measured,decided,changed your mind and finally made up your mind about the width and breath of your headboard, you can begin with step 3. Take the pallet pieces you have sanded down and divide them into two’s, because my pallet pieces were so long i could easily place one on top of the other and join them by drilling 4 holes and screwing in 4 screws. Repeat this process until, when you lie the pieces underneath each other they are the breadth that you want.( I decided my breadth of the actual headboard by taking the measurement from the top of the mattress to the top point of the headboard, less a space for pillows). If your pieces are not long enough you will have to mend them together at the back. (What would a project at 7 o’clock at night be without a bit of energy)
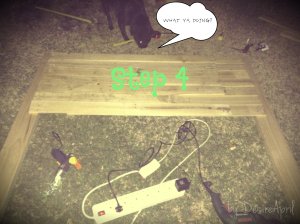
STEP 4
It’s time to attach your headboard to the anchor pieces. I did this by drilling two holes per side of the pallet and attaching the pallet to the anchor poles. DO NOT attach the last pallet as it will be used in step 5.
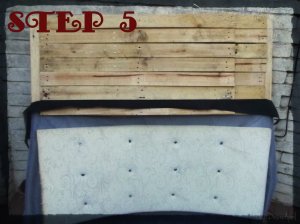
STEP 5
Congrats you are halfway! Now its time for some good old sitting and threading! When purchasing your material, do not buy it to the exact measurement of your board, you will need more so as to attach the material at the back of your board. Once you have decided where the sponge will meet the material and the placement of your buttons( I used measuring tape to get the pattern on the material that i wanted to make with the buttons and so that i could see if what i imagined was in accord with what would actually be), you can begin to thread the buttons through the sponge.
STEP 5.1
When you have your material/sponge finished, you can now attach the material to the pallet you have not yet attached to the frame. I would suggest doing this with a staple gun. When the material and pallet are one, you can then attach it to the frame the same as you did with the previous pallets.
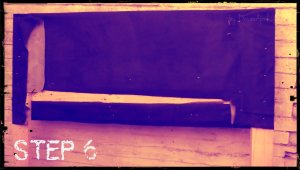
STEP 6
Take the staple gun and staple the material to the back of the board. As fate would have it the one side of mine came out perfectly and the other, well lets say not so much.
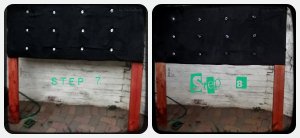
STEP 7 & 8
Now for the easy part, sit down and relax. All you have to do now is stain and varnish your wood.
Tada a headboard was made! 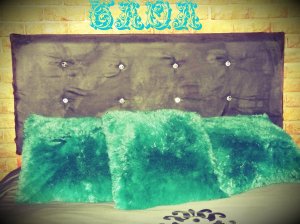
I hope this was helpful and would love to see your headboard master piece, so leave a link in the comment box.
Happy D.I.Y ing!